
Adobe Premiere High-Performance Remote Workstation in AWS
Have your own Adobe Premiere high-performance remote workstation in AWS where you can easily store and work with your high-res content.
Build your own high-performance remote workstation in AWS where you can easily work with high-res content in Premiere.
You won't need to buy any hardware, you just need a decent internet connection and a cheap laptop.
The workstation will use an AWS Marketplace AMI by Teradici. It runs Windows Server 2016 with the Teradici Cloud Access software pre-installed. Both the instance and Teradici host software are per-hour pricing.
Some of the benefits of this setup:
- Work from anywhere, using a cheap laptop using a thin client and still do heavy-lift editing on a powerful PC
- Save on equipment costs, and instead, rent state-of-the-art and pay only for what you use
- Get cheap and virtually unlimited storage for your high-res content using S3
Preparation
You should do the following before going further (if you haven't already):
- Create an AWS account: https://aws.amazon.com/
- Subscribe to the Windows Server GPU AMI: https://aws.amazon.com/marketplace/pp/B073WHLGMC
- Subscribe to the Teradici AMI: https://aws.amazon.com/marketplace/pp/B07CSG43VK?ref=cns_1clkPro
- Download Teradici's Software Client: https://docs.teradici.com/find/product/software-and-mobile-clients
- Signup for an Adobe Creative Cloud Account
Studio in the Cloud Overview
This walkthrough is based on a reference architecture and guide that was developed by Teradici and AWS: https://aws.amazon.com/quickstart/architecture/cloud-video-editing/.
It's part of the larger idea of Studio in the Cloud and there is a great talk from re:Invent 2019, the link starts at virtual workstations.
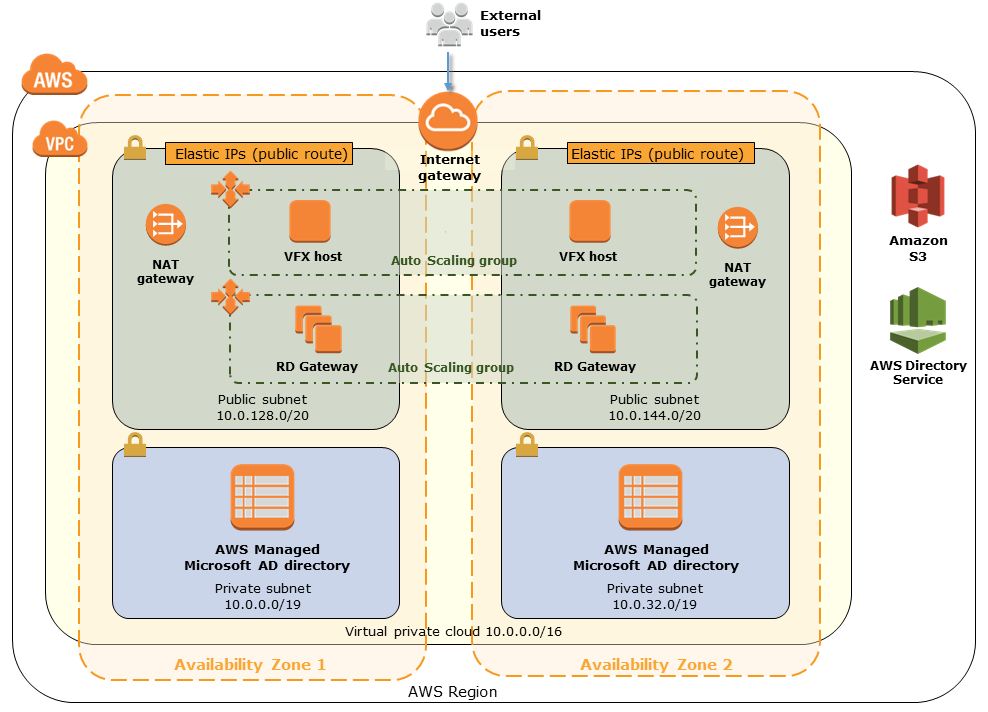
Above is the reference architecture shown in the video. As you can see it's a turn key solution including workstations, active directory, remote desktop gateways, NAT gateways and other supporting services.
Poor-Man's Version
In this walkthrough, we're going to focus on just the GPU workstation and required infrastructure to support it.
Warning
Note that it is for prototyping, and for simplicity uses a publicly available instance. You should consider all of AWS well-architected guidelines, for example, put the workstation in a private subnet with NAT gateway, RD gateways and lock-down security groups.
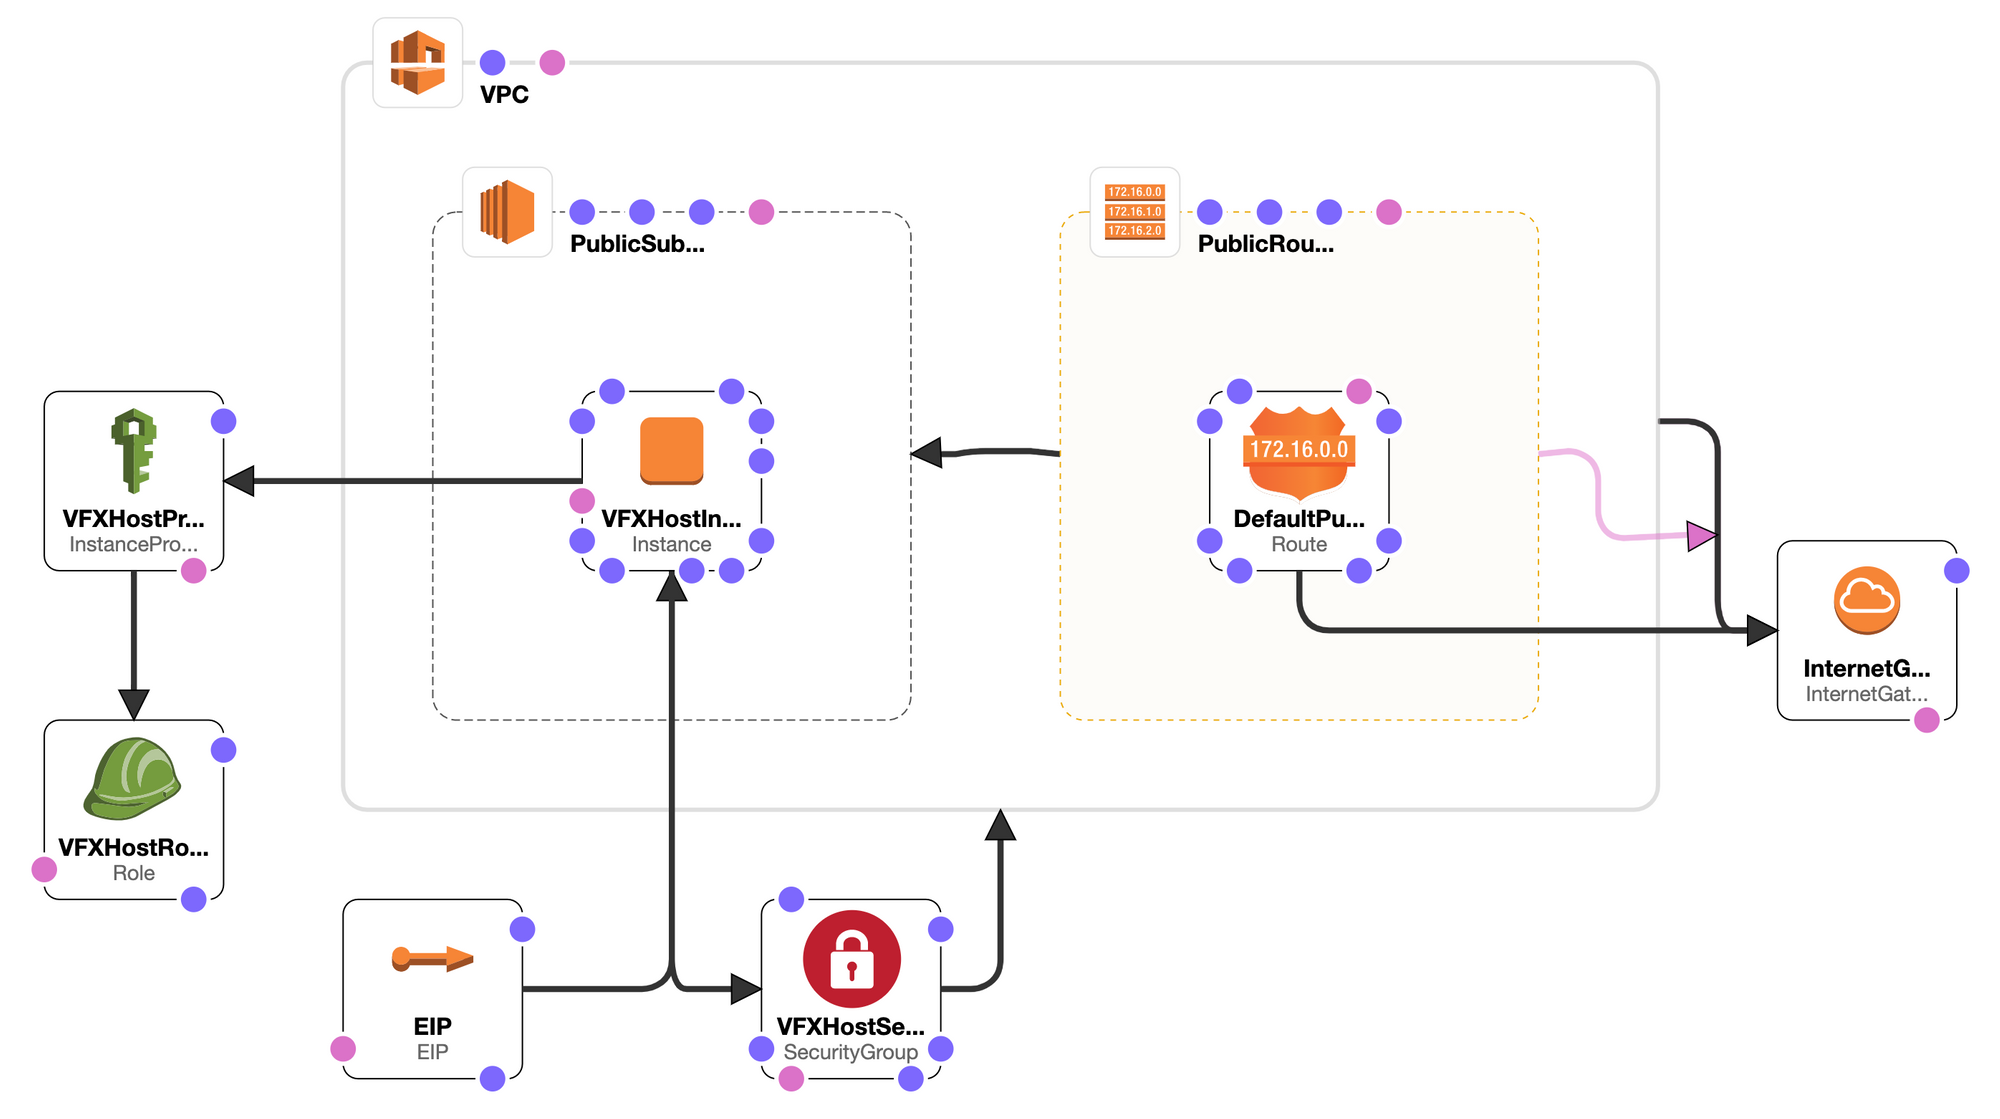
The architecture above has a VPC with one public subnet, route table and internet gateway. Your workstation will be placed in the public subnet and assigned an Elastic IP address.
The workstation IAM role and instance profile will give your host access to S3 resources later. The security group has open ports 3389 (RDP) and 4172 (Teradici).
Creating the Stack
Click the deep-link below go to CloudFormation with the template pre-loaded.

You must enter the following stack parameters on the next screen:
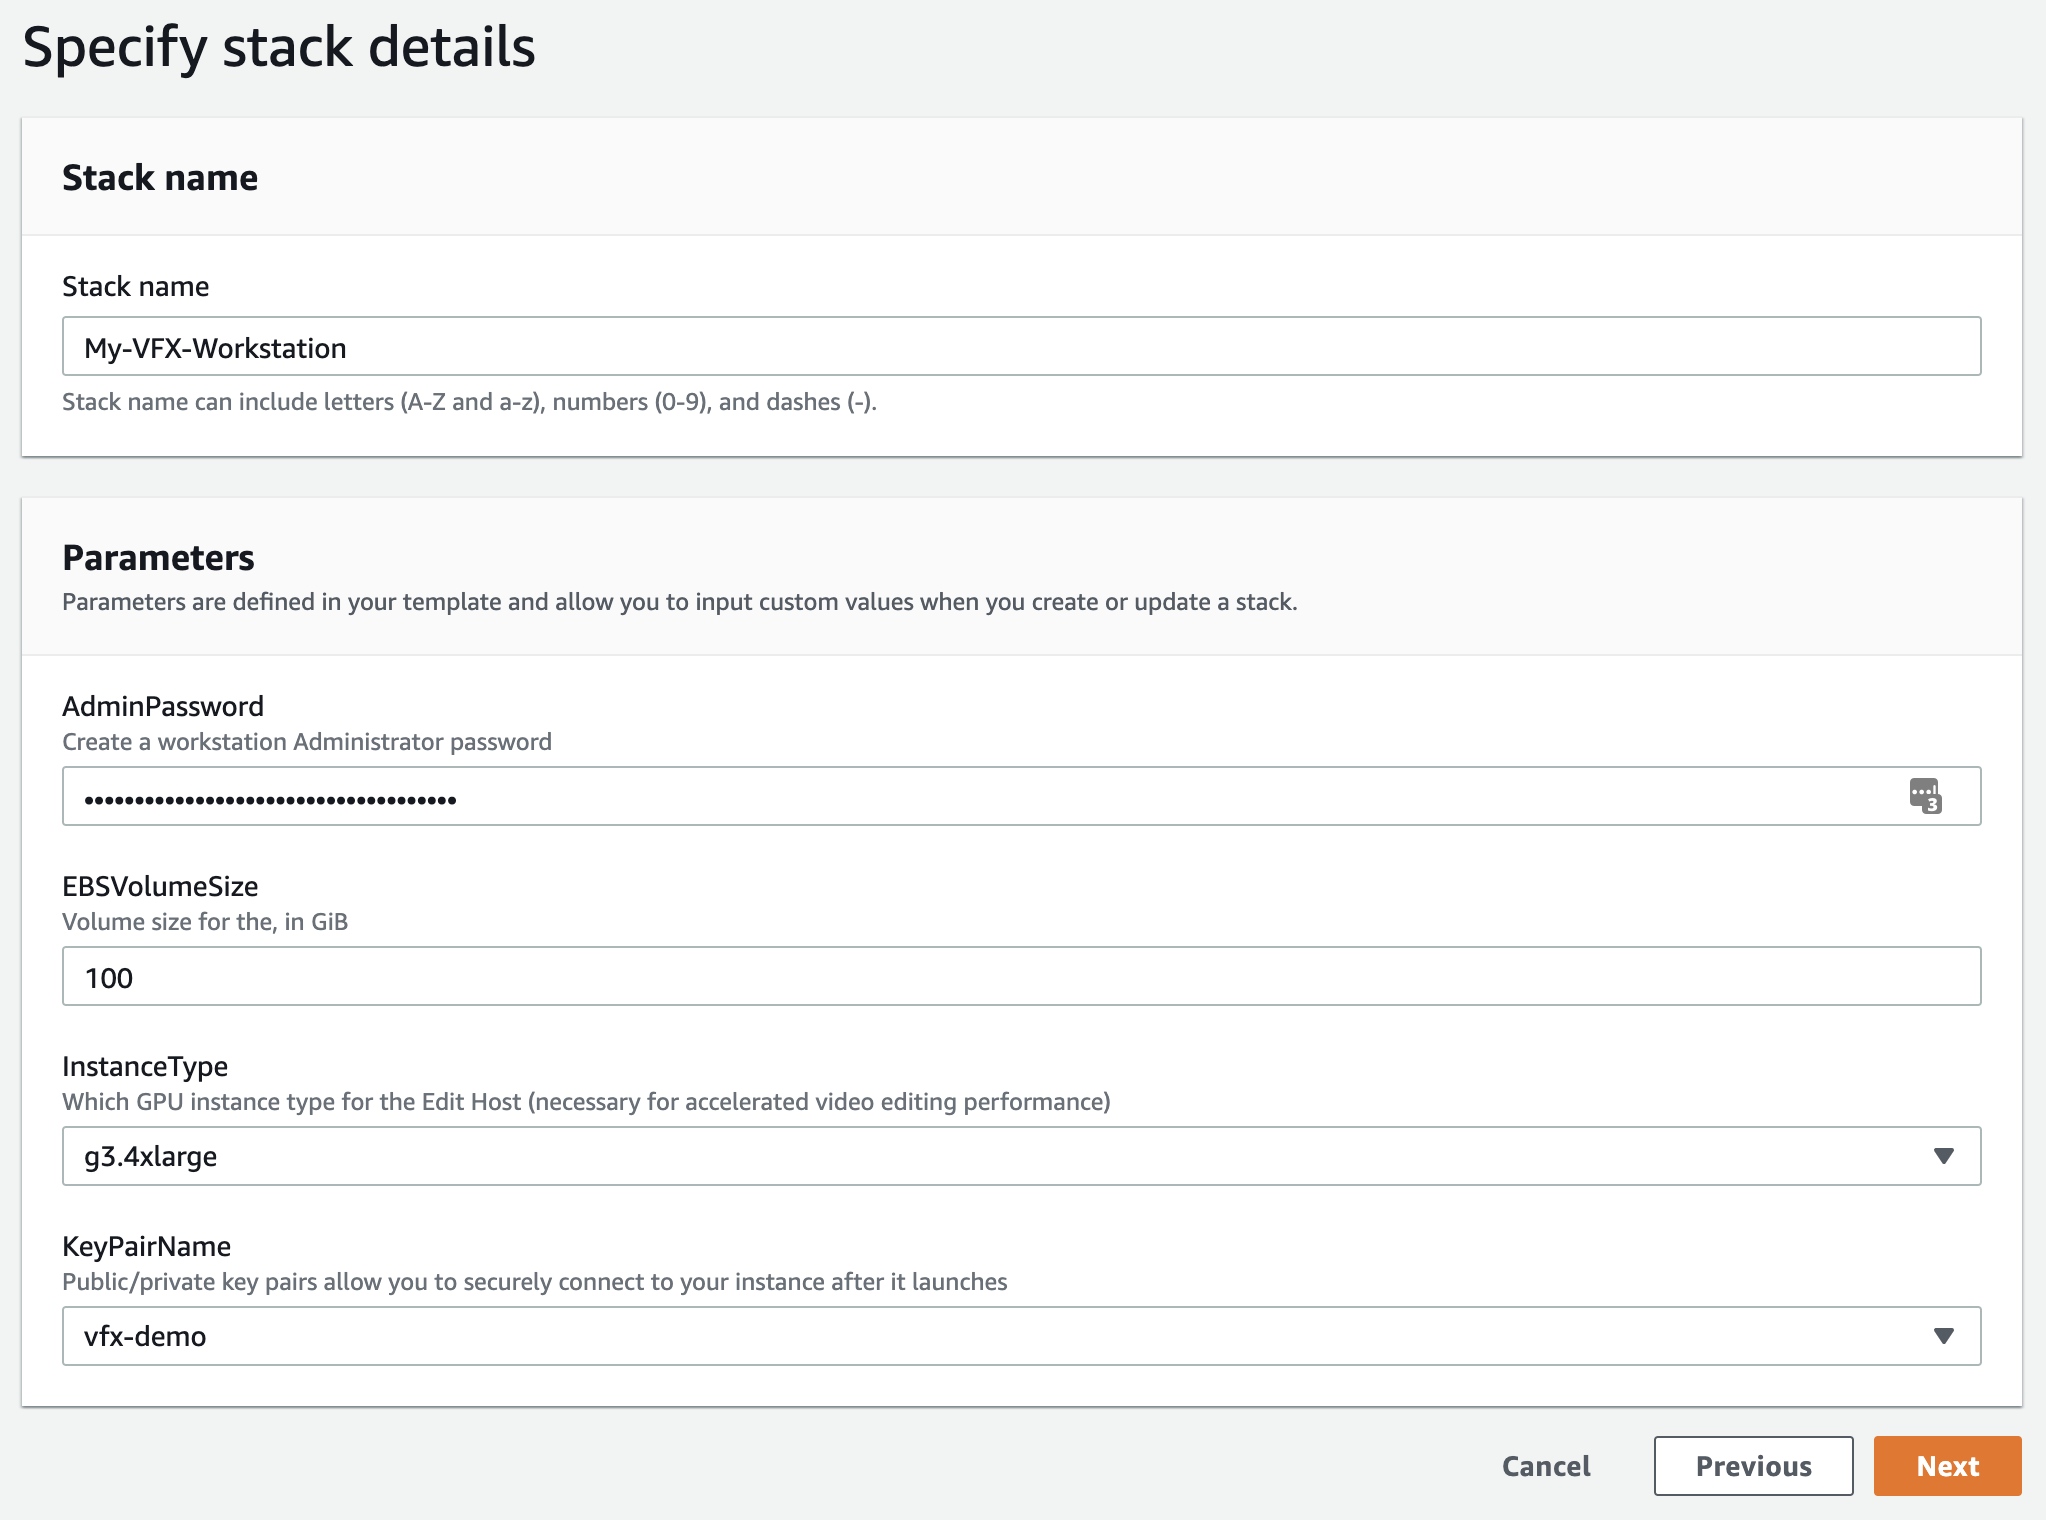
AdminPassword: Workstation Administrator account password.EBSVolumeSize: Workstation C drive size in gigabytes.InstanceType: Workstation GPU instance type, currently limited to G3 class instances.KeyPairName: Select the key pair from the dropdown.
When this stack is complete, you will have a running EC2 instance, go to the Outputs tab and you will see the public IP that was assigned:

The EC2 instance comes pre-installed with GPU drivers and the Teradici Cloud Access software, refer to this https://aws.amazon.com/marketplace/pp/B07CSG43VK?ref=cns_1clkPro for more information on requirements and pricing.
Now you can open the Teradici PCoIP Client and connect to your instance.
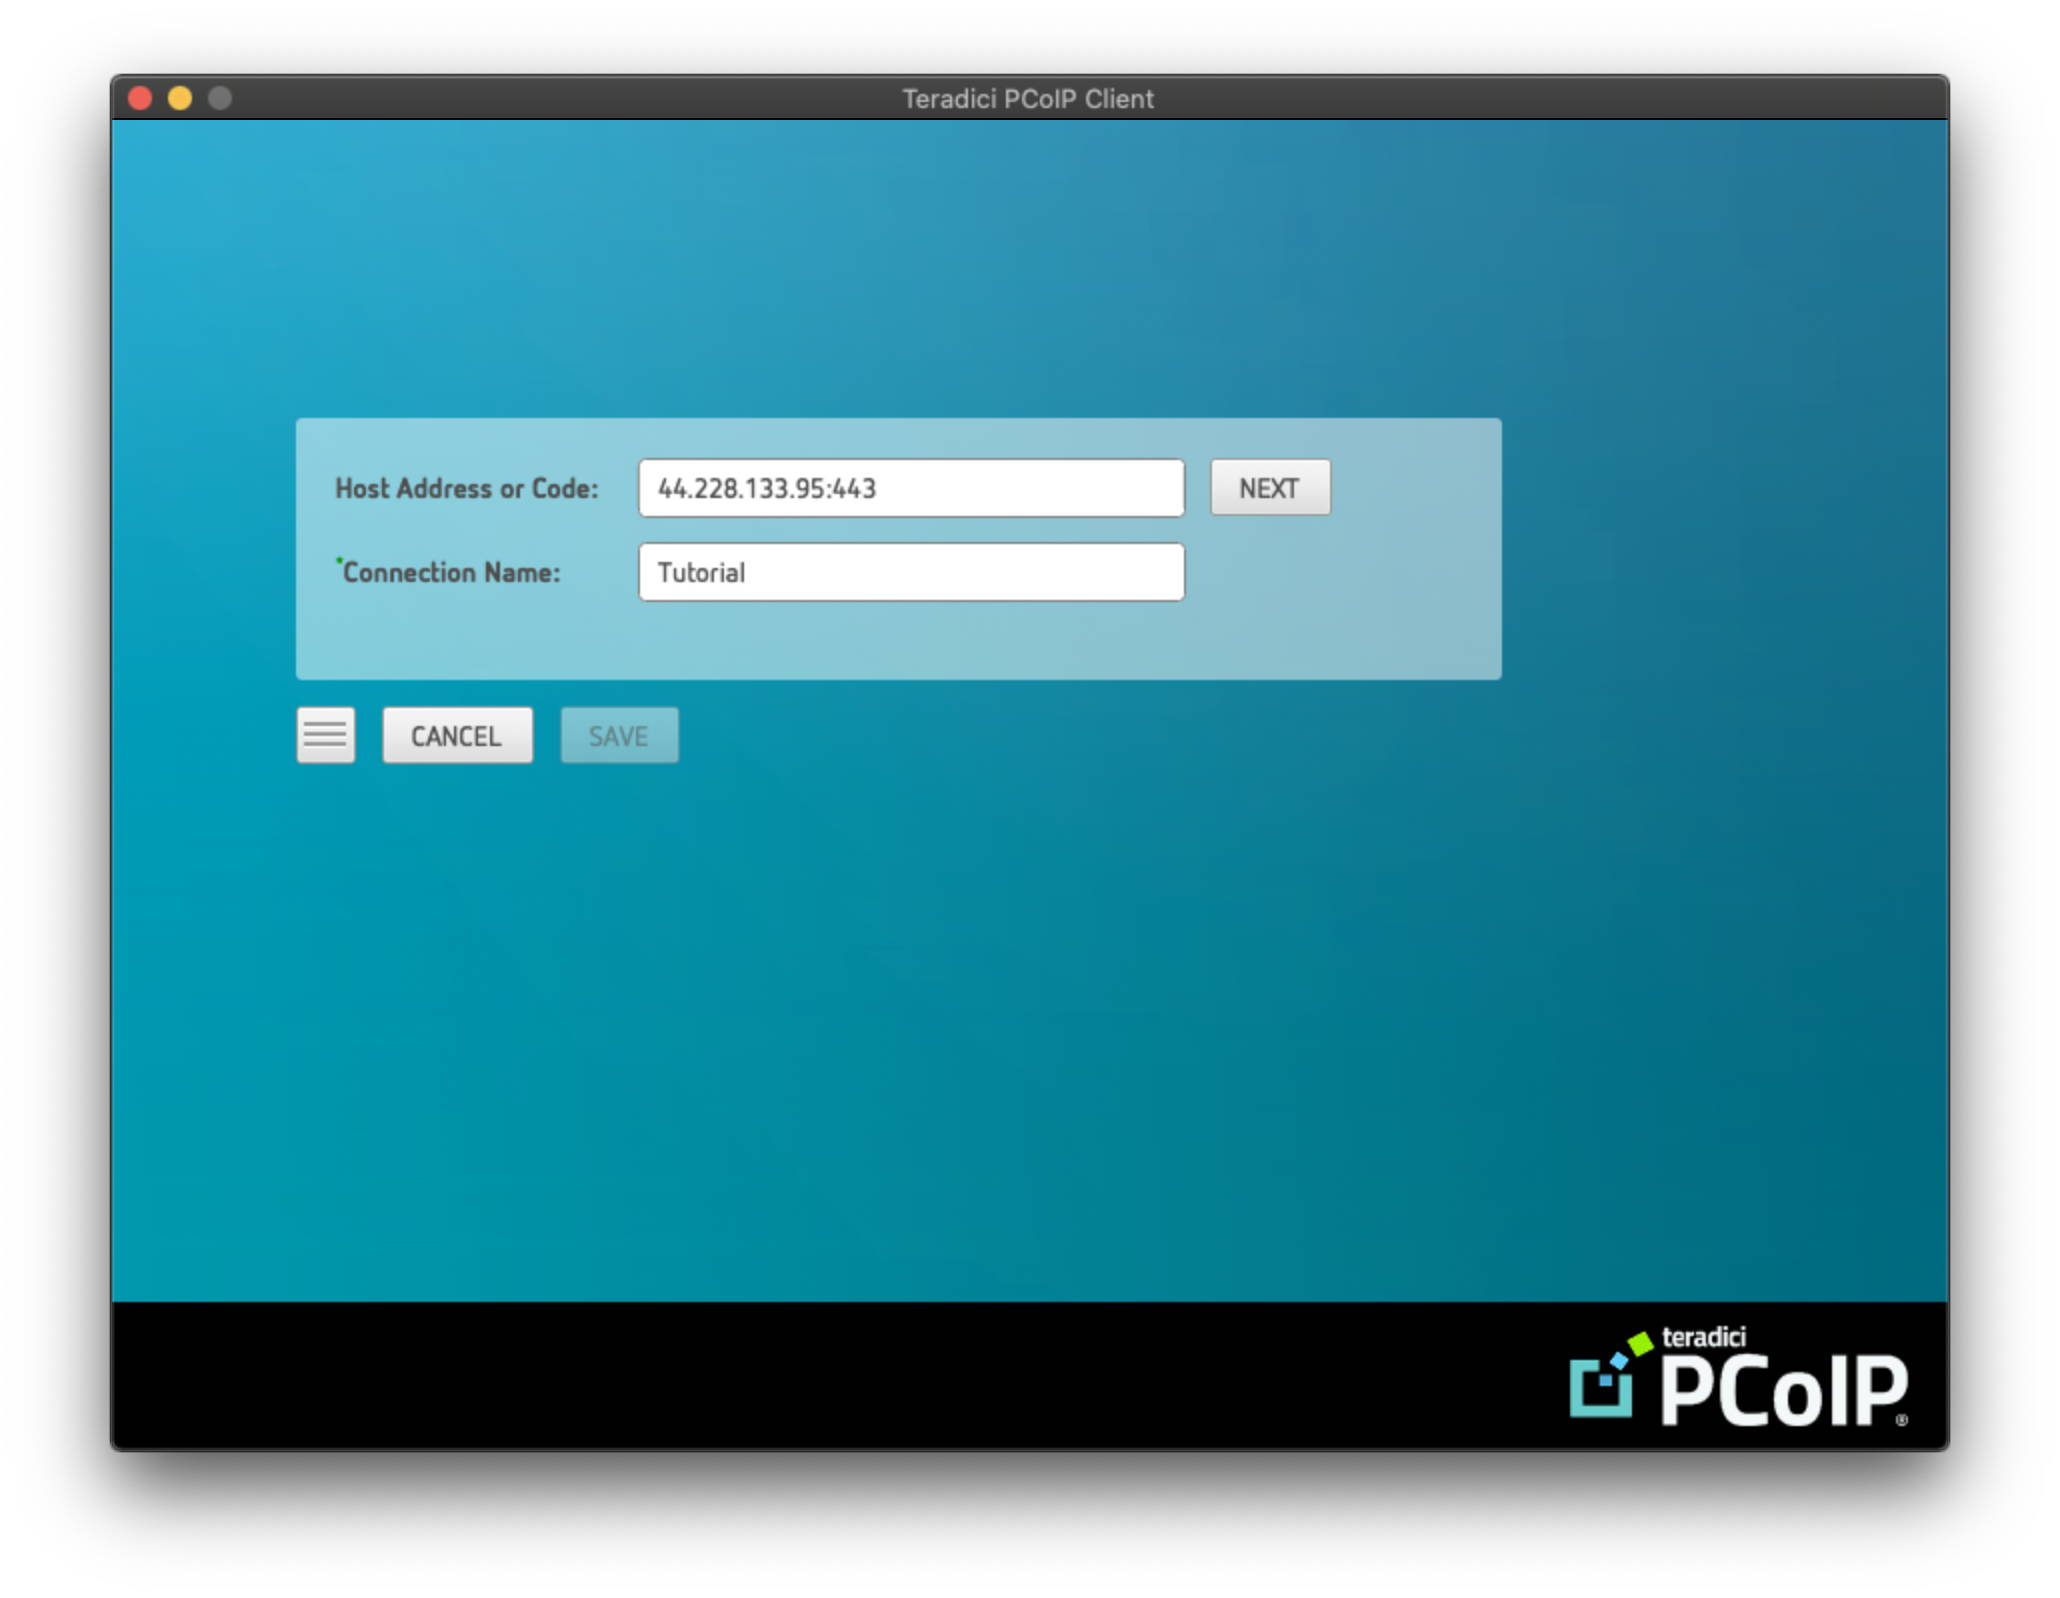
Enter "Administrator" as the username and the password you provided when creating the stack.
After you log in, you will need to install Adobe Creative Cloud Desktop Application. Unfortunately this can't be done before-hand because the installer requires sign-in.
Once you've signed in and installed Adobe Premiere, you can start editing just like you would on your local PC. Of course, getting files to and from the instance would require some care. In the next post, I'll go over how to setup shared storage.
Wrapping Up
Be sure to stop your running instance when you are done. These GPU instances are not cheap and you will quickly erode any savings by forgetting it for a few hours.
When you're ready to terminate the instance, just delete the stack, it will cleanup all of the resources associated with it.
If you stored any files on the instance, be sure to offload them to S3 or your local machine as they will be lost when the stack is deleted.
About Me
I'm a software engineer and hold a Masters degree in Mechanical and Aerospace Engineering from the University of California, Irvine. My broad background helps me adapt and stay passionate about finding pragmatic solutions to complicated problems. Let's chat ackhatib@gmail.com.